Formatting New Drive For Os X
Select Install OS X from the options. Select your drives as the destination and install. Installing a SATA Drive as a Boot drive 10.6 to 10.10 Note: Reformatting the drive will erase all data on the drive, so you should copy any data you want off the drive prior to formatting. Physically install the drive into the Mac. Formatting & Partitioning a Hard Drive in OS X - Tiger and Leopard By Ken Stone Partitioning a hard drive is the process of dividing a hard drive into separate, discrete sections, called 'volumes'. You can create up to 16 different partitions on a hard drive, each one can be of different size and format, even including the 'MS-DOS' format for.
Sep 06, 2019 How to install macOS or OS X on a new hard drive for your Mac Quick Tips. Install macOS or OS X from Internet Recovery Mode, which you can boot into by holding option+command+R while. Format your new hard drive for macOS or OS X. You may need to reformat your new hard drive before installing macOS. Select your new volume (indented) and click on the 'Restore' tab. Drag your old volume to the Source field. Drag your new hard drive to the Destination field. Click the check box for 'Erasing Destination'. Click restore at the bottom and it then will start copying over to your new hard drive.
Earlier today in the Apple Macintosh Enthusiasts Facebook group, Charles Lott asked if an OS X Mac with a USB floppy drive could write disks that a Mac running System 7 could use. The short answer is, it depends.
400K Disks
The original Mac floppy disk format was MFS, for Macintosh File System, and it is only used for 400K single-sided floppies – the only kind of floppy drive supported by the original Macintosh, the Mac 512K Fat Mac, and the Lisa 2 (a.k.a. Macintosh XL). These drives had a variable speed motor that allowed the Mac to pack 400K into a disk that would only hold 360 KB on a fixed-speed drive. (This is also the reason non-Mac computers can’t mount 400K and 800K Mac floppy disks.)
Macs with 800K double-sided drives and Mac-compatible 1.4MB High Density (HD) drives can read and write the MFS format used by 400K disks as long as they are running System 7.5.5 or earlier. Under Mac OS 7.6 and 7.6.1, they can read 400K floppies but not write to them. There is no support at all for 400K floppy disks in Mac OS 8 and beyond.
There is also no support for floppy disks with greater than 400K capacity in those original three models. Disk access is controlled by code in the system ROMs, and that can’t be updated to support double-sided drives. (There is also a 20 MB maximum volume size for MFS hard drives.)
All Mac OS versions up to System 7.1 support formatting 400K floppy disks.
800K Disks
When Apple introduced the Mac Plus in January 1986, it adopted double-sided floppy drives with 800K capacity – and a newer disk format known as HFS, for Hierarchical File System. (HFS had been introduced in 1985 to support Apple’s first Mac hard drive, the 20 MB Hard Disk 20, which connected via the slow floppy disk port. Those with pre-1986 Macs had to boot from a floppy drive that would install the HFS drivers that allowed them to boot from the HFS formatted hard drive.) MFS disks use a flat file system. Although the Mac makes it appear that it has true folders, this is an illusion.
With HFS, the Mac gained a multi-level hierarchy of folders and the ability to access hard drive volumes at huge as 2 TB. Keep in mind, this was the age of 20-40 MB hard drives, 1 GB drives were a long ways off, and its only in recent years the 1 TB drives have become commonplace.
Except for the pre-1986 Macs that have built-in 400K floppy drives, all Macs running System 3 through Mac OS 9.2.2 and using an Apple or specifically Mac-compatible floppy drive can read 800K floppy disks. (Mac OS X does not support internal floppy drives.)
Macs running System 3 through Mac OS 9.2.2 support formatting 800K floppy disks.
1.4 MB Disks
Apple introduced high density (HD) floppy disks to the Mac with the Mac IIx in September 1988. Going forward, all new Macs with floppy drives would have what Apple sometimes called FDHD (floppy disk, high density) or SuperDrive – not to be confused with the DVD-burning optical drive of the same name.
Not only that, but the Mac SE was updated with the HD drive, and Apple offered upgrade kits for both the Mac II and pre-FHDH Mac SE. Because their system ROMs did not support these drives, the 1986 Mac Plus and 512Ke do not work with Apple’s HD floppy drives.
Apple SuperDrive floppy drives use a variable speed motor, making them compatible with 400K and 800K floppy disks – as long as the operating system also supports them.
Any Mac with a built-in floppy drive introduced since September 1988 has an FDHD, and the March 1987 Mac SE and Mac II may have been updated for FDHD as well. Every version of the Classic Mac OS from System 3 through 9.2.2 can read, write, and format 800K and 1.4 MB floppy disks as long as the mechanism is an Apple FDHD or a third-party Mac-compatible drive with a variable speed motor.
Macs with high-density Apple floppy drives and System 3 through Mac OS 9.2.2 support formatting 1.4 MB floppy disks.
Mac OS 8.1: HFS+ Makes More Efficient Use of Disk Space
As hard drives grew in capacity, some limitations of the HFS format became apparent. In the era of small hard drives, it didn’t matter, because whether you were using a floppy disk, a hard drive, or a removable media (SyQuest, Zip, etc.) drive, they all used the same size block of data – 512 Bytes (0.5 KB).
Or did they? Another limitation of HFS is that it cannot work with more than 65,535 files or blocks of data. That meant the operating system would have to cluster more than one 512 byte chunk of data into an allocation block. For instance, on a 1 GB partition, space was allocated in blocks of 16 KB, using 32 of those 512 byte data blocks.
Apple addressed this by introducing the HFS+ file system with Mac OS 8.1 in January 1998. HFS+ supports over 4 billion allocation blocks. That means that a 500 MB drive or partition will still use 512 Byte allocation blocks, a 1 GB drive will double that to 1024 Bytes (2 x 512), and so on.
Under HFS, that began to happen once hard drives passed the 30 MB mark, so HFS+ made for much more efficient use of data space. Below 32 MB of so, HFS and HFS+ both use 512 byte allocation blocks.
Alsoft created PlusOptimizer to convert HFS hard drives to HFS+ format.
And what does this have to do with floppy disks? Keep reading, because HFS+ floppies became a possibility in the era of USB floppy drives!
Macs Without Floppy Drives: The iMac Generation
1.4 MB Only (Sort of)
One of the chief faults of the iMac when Steve Jobs unveiled it in May 1998, according to most critics, was its lack of a built-in floppy drive. This was especially true for people who had an iMac at school or work but an older Mac or PC at home. You had to buy a USB floppy drive to read the disk from your other computer.
Problem is, none of these USB floppy drives have the variable speed motor necessary to read the Mac’s 800K disks, so you had to be sure to use 1.4 MB HD floppies (or 720K floppies in the case of PCs with 3.5″ floppy drives). Fortunately all but the oldest Macs support HD floppies, but the expense of an external USB floppy drive was discouraging to many longtime Mac users – and potential iMac adopters.
Another option was to use Apple’s software to format a double-sided, double-density floppy to 720K instead of 800K, in which case most USB floppy drives can read and write to it. On the other hand, it’s a pain to use with Macs, which don’t expect that format.
Mac OS X Changed Everything
When Apple introduced Mac OS X, one thing it didn’t do is provide drivers for the Mac’s internal floppy drives. It does support USB floppy drives, and it would normally format them as HFS disks – although there were some changes over time.
Siber-Sonic, who used to work for Apple, did extensive research of this subject, answering the question, “If I format a HD floppy disk in a USB floppy drive, what format with OS X use? Also, do all versions of OS X support HFS floppies?”
HFS Floppies: Fully Readable, No Writes with OS X 10.6 or Later
The good news is that all tested versions of Mac OS X are able to read 1.4 MB floppy disks in a USB floppy drive. The bad news – well, at least less good – is that starting with Mac OS X 10.6 Snow Leopard, you can’t write to an HFS-formatted floppy disk. To do that, you need to use OS X 10.5 Leopard or earlier.
HFS+ Floppies: Full Compatible with All Versions of Mac OS X

Under OS X 10.6 or earlier, the default format when formatting a floppy disk is HFS, but earlier versions (at least back to 10.4 Tiger) let you choose HFS+ as your disk format.
1.4 MB floppy disk formatted as HFS has 1.4 MB available space.
1.4 MB floppy disk formatted as HFS+ has 1.3 MB available space.
Would you have guessed that an HFS+ floppy would have less available storage space than an HFS disk? Roughly 123 KB of additional space is used by the file system. Regardless, at least you have a floppy disk you can use in current Macs as well as vintage ones running Mac OS 8.1, the first with HFS+, and later.
What About More Modern Macs and Mac OS Versions?
Siber-Sonic found that under OS X 10.8 Mountain Lion, although the operating system can read and write HFS+ floppies, the only options for formatting are the FAT and ex-FAT formats used in the Windows world. That said, they can still read those HFS floppy disks from 1988!
Summary
In short, 400K MFS floppy disks can only be used in Apple branded and Mac-compatible 400K, 800K, and 1.4 MB drives. You can write to them through System 7.5.5 and read them through Mac OS 7.6.1. You cannot access them at all in Mac OS 8.0 or newer
800K floppy disks also require an Apple branded or Mac-compatible floppy drive with a variable speed motor. These can be used in any Mac with an 800K of FDHD floppy drive with System 3 through Mac OS 9.2.2. They are not compatible with any version of Mac OS X.
1.4 MB HFS floppy disks require an Apple FDHD, Mac-compatible HD floppy drive, or USB floppy drive. They are supported in all versions of the Classic Mac OS from 3.0 through 9.2.2 and can be read in any Mac. You can write to them using System 3.0 through Mac OS X 10.5 Leopard. Later versions of OS X can read but not write to them.
Finally, 1.4 MB HFS+ floppy disks can be fully accessed from Mac OS 8.1 forward, although OS X 10.8 Mountain Lion and later will not let you format an HFS+ floppy. OS X 10.6 and 10.7 will let you erase an HFS floppy, but they will only format floppy disks as HFS+.
Further Reading
- Working with Macintosh Floppy Disks in the New Millennium, Siber-Sonic
- Mac OS X: Mac OS Extended (HFS Plus) Volume and File Limits, Apple
- Technical Note TN1150: HFS Plus Volume Format, Apple Developer Connection
- Macintosh File System, Wikipedia
- Hierarchical File System, Wikipedia
- HFS Plus, Wikipedia
- HFS+ Floppy Disks, 68kMLA
Keywords: #macfloppy #hfs #hfsplus
Short link: http://goo.gl/plGnYa
Hello and welcome to my User Tip
As people begin to sell their used Intel processor Mac's problems are occurring when the new owner wishes to wipe everything and make the machine their own due to complexity of reinstalling various OS X versions, AppleID conflicts etc, so I will attempt to clear up the issue and provide concrete procedures you need to follow.
The previous owner is supposed to remove any firmware passwords, erase everything and reinstall the OS X version that came with the machine or OS X 10.6 (if the machine originally came with 10.6, 10.5 or 10.4), but usually this doesn't occur and when the new owner goes to update OS X or reinstall the OS, they are blocked in some manner.
This User Tip is designed to cover Intel Mac's, older PPC processor based Mac's came with their own OS X disks or 10.5 upgrade disks and that's the last OS X version that can run on those machines. 10.5 is currently not supported for security issues etc., so if your using this, use it off the Internet.
OS X boot drives formatting
All OS X boot drives must be formatted in Apple's Disk Utility (as minimal) 1 Partition: Option: GUID and OS X Extended Journaled as the format.
All OS X boot hard drives (not Solid State Disks) should be futher erased with the Security Option: Zero All Data or move the slider one spot to the right, this has a effect of wiping all data off the drive and also eliminates bad sector issues that can prevent a drive from formatting or even installing OS X. It does take some time to complete but it's worth it to prevent drive issues later. If the drive fails the zero erase procedure, it's bad and requires replacement. Be glad to know it now than later on and takes your data with it.
If you require more complicated behind the scenes action then read these
Identifying the machine
First off if the machine is bootable to OS X, head to the Apple Menu > About This Mac and note the OS X version.
Then do > More Information and write down all what you see there.
What is important is the Model Identifier, the Serial Number and the Memory, get all this written down.
If the machine is not booting into OS X, then you will have to work from the Serial Number located on the outside of the machine or box someplace.
This Apple support document will assist you getting the Serial Number: https://support.apple.com/kb/HT1349
If the machine is hold Command(⌘) r booting into RecoveryHD, or hold Command(⌘) Option/alt r booting into Internet Recovery (connected via Ethernet to router/modem (wired or built in keyboard needed for at boot key commands)
Then use Terminal and enter this command followed by the return/enter. With OS X being tied to a previous owners ID, you likely can't reinstall it.
ioreg -l grep IOPlatformSerialNumber
Launch the System Preferences.Screenshot 1: Launch System Preferences. 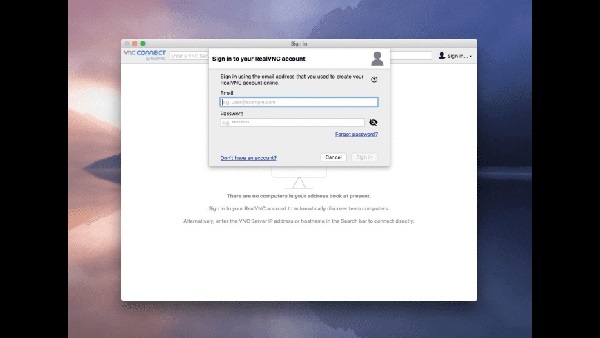 Starting the Mac OS X VNC Server. Enable Apple Remote Desktop within the Services panel.Screenshot 3: Enabled Apple Remote Desktop. Select the Sharing preferences.Screenshot 2: Open the Shared preferences. These are no longer needed with Mac OS X 10.4 and later.The VNC server built into your Mac is free, easy to switch on, and supported by Apple.
Another method to get the profile of the machine is to use Apple's Hardware Test, which in some cases will provide Model Identifier and Serial Number as well as a host of other data about the machine, like the RAM etc. Apple also has links to identify the machine.
Newer machines download Hardware Test from Apple via the Internet, so connect a Ethernet cable (preferred) and press and hold the D key and boot the machine.
If your required to hold the D key down at boot, it takes awhile, so hold on for about 5-7 minutes.
You can try this to see if it works, no big deal if it doesn't, just see the link above and see if older Hardware Test versions will give you the reqired machine information.
This website will assist you in identifying the Model Identifier based upon the last 3 or 4 digits of the Serial Number.
The Model Indentifier looks like 'MacBook Pro 4,1' or similar.
You can also use the following Apple resources for assistance identifying your Mac NoteBook or Desktop:
To determine what OS your Mac NoteBook or Desktop shipped with you can use Mac OS X versions (builds) for computers.
Ok, at this point you should have the Serial Number and the Model Identifier at least.
Wired or built in keyboard needed
If the machine has a built in keyboard (laptops) then your ok, just use that. If the machine has a wireless keyboard, you will need to connect a wired one to proceed further.
A PC keyboard should work, the Windows key is the same as the Apple/Command Key and the option/alt is the same as well.
From now on, use the wired keyboard until your back setup on OS X and can establish a new wireless keyboard.
Formatting New Hard Drive Mac
Checking for a Firmware Password
We need to check to see if a Firmware Password has been set on the used machine.
You can do this by holding Command⌘ V and booting the machine. What will occur differently when OS X is booting is you will see a black screen with a bunch of white text scrolling down and then presented by the log in screen or logging in as normal like before.
If your instead presented with a lock symbol and a request for a password, the a firmware password has been set and needs to be removed first before you can proceed.
You will need the firmware password to remove it, it's the ultimate lock down of a Mac designed for schools and security purposes. However it can be bypassed.
I recommend at this point you take the machine to a local Apple repair or store and have them reset the machine, as it involves doing internal work. Also you might want to take this opportunity to have them check the RAM amount and install more to max the machine of it's capacity to hold RAM, as it will perform better.
As a extra caution, I would bring receipts and proof of purchase of the used machine, because to Apple it technically belongs to another person on their records.
At this point there is no Firmware Password or it has been removed so the at boot key commands will work.
Last chance to backup any files
I do NOT advise TimeMachine being your only copy of your precious users files, make a copy of files to a normal regular external drive.
The reasons for this is TM is designed to restore the current machine owner, and if you come to find out it's all tied to the previous owner, your going to change that and thus may have troubles with TM.
So just having your user files on a external drive you can recover just those in your new setup.
Disconnect all drives when messing around with Disk Utility and OS X reinstalls to prevent TM from activating and making mistakes.
The quickest way to determine what you can do
Hold the Command⌘ Option r keys down using a wired or built in keyboard and boot the machine on a fast, reliable Internet connection using a Ethernet cable to your router (preferred) or connect using Wifi.
Formatting New Drive Windows 10
If you load Internet Recovery, then use that Disk Utility to erase the ENTIRE drive of all partitions, check under Partitions that the Partition: 1, Option: GUID and OS X Extended Journaled as the format, give it a name MacintoshHD and apply.
Quit Disk Utility from the file menu and install OS X using your AppleID and password.
This is the tester, if your AppleID and password is accepted and OS X begins installing, then your good to go.
You can upgrade to a later OS X version in AppStore or by calling Apple for the latest OS X version for that machine, they will send you a installer link.
If it doesn't install, it means that OS X version was purchased by the previous owner, you will need the 10.6 install disks.
More complicated OS X installs
Because OS X 10.7 (and up) upgrades are tied to a purchaser, like AppStore software is, they cannot be updated or reinstalled by another owner with a different AppleID and password.
Below is the lowdown on the more complicated OS X installs when Apple transitioned from boot disks to Internet only installs of OS X
If the machine was upgraded from OS X version 10.6.8 to 10.7:
Then using Internet Recovery (if the machine is capable of it) will restore OS X 10.7 as also will Recovery HD partition on the boot drive.
Only the original purchaser of 10.7 from the AppStore can reinstall OS X 10.7 using their AppleID and password.
Other owners will have to reinstall OS X 10.6 first via the appropriate 10.6 install disks, then can upgrade to the latest OS X version the machine supports via AppStore, or by calling Apple and ordering one of the later versions the machine supports and receiving a link to the download
If the machine was upgraded from OS X version 10.6.8 to 10.8:
Then using Internet Recovery (if the machine is capable of it) will restore 10.8 as also will Recovery HD partition on the boot drive.
Only the original purchaser of 10.8 from the AppStore can reinstall OS X 10.8 using their AppleID and password.
Other owners will have to reinstall OS X 10.6 first via the appropriate 10.6 install disks, then can upgrade to the latest OS X version the machine supports via AppStore, or by calling Apple and ordering one of the later versions the machine supports and receiving a link to the download.
If the machine was upgraded from OS X version 10.6.8 to 10.7, then from 10.7 to 10.8:
Then using Internet Recovery (if the machine is capable of it) will restore 10.7 and Recovery HD partition on the boot drive will restore 10.8.
Only the original purchaser of 10.7 from the AppStore can reinstall OS X 10.7 using their AppleID and password.
Only the original purchaser of 10.8 from the AppStore can reinstall OS X 10.8 using their AppleID and password.
Other owners will have to reinstall OS X 10.6 first via the appropriate 10.6 install disks, then can upgrade to the latest OS X version the machine supports via AppStore, or by calling Apple and ordering one of the later versions the machine supports and receiving a link to the download.
If the machine came with OS X 10.7 installed from the factory and upgraded to 10.8:
Then using Internet Recovery will restore 10.7 and Recovery HD partition will restore 10.8
Any owner can install 10.7 from Internet Recovery, but a AppleID and password is required.
Only the original purchaser of 10.8 from the AppStore can reinstall OS X 10.8 using their AppleID and password.
Formatting New Drive For Os X 8
Other owners will have to reinstall OS X 10.7 first via Internet Recovery, then can upgrade to the latest OS X version the machine supports via AppStore, or by calling Apple and ordering one of the later versions the machine supports and receiving a link to the download.
The following machines are capable of installing OS X 10.6:
All Intel processor Mac's prior to 2011 will install OS X 10.6 with the 10.6.3 white retail disks sold online provided the machine originally came from the factory installed with OS X 10.6.2 or earlier.
All Intel processors Mac's prior to 2011 and released with OS X 10.6.3 or later originally installed from the factory require model specific install disks only attained by directly calling Apple and ordering them.
All Mac's sold new after January 2011 until apx July 20, 2011 (when OS X 10.7 was released) require model specific OS X 10.6 (10.6.3+) install disks that can only be attained by calling Apple directly.
Nearly all Mac's sold after July 20, 2011 came with factory installs of OS X 10.7, the firmware will refuse to boot off the 10.6 disks even if they are the model specific ones, however if OS X 10.6 can be put on the drive via Firewire Target Disk mode or removing the drive and using another Mac, then the Mac will boot from it.
How to find out what OS X 10.6 disks to use:
If your unsure of what OS X install disks will work, you can use the Model Indentifier (ex: MacBook Pro 4,2) to consult the free MacTracker as to find out what OS X version originally shipped on that machine (not perfect for 2011) or call Apple and provide the machines serial number.
The machines serial number or model identifier can be located in software or outside the machine: https://support.apple.com/kb/HT1349
Or if you have the machine connected to a Internet you can boot the machine while holding D down for about 7 minutes to load Hardware Test which has a pane at the top to select and provides the information.
Mac OS 10.13 High Sierra Update Features. Apple has wowed its loyal subject, once again, by introducing a new OS update. Beyond the newly enforced automatic security checks on EFI firmware being done each week, this new OS update, the macOS 10.13 High Sierra, comes with cool new features. They include. No more updates for mac os sierra. Oct 18, 2019 Open the App Store app on your Mac. Click Updates in the App Store toolbar. Use the Update buttons to download and install any updates listed. When the App Store shows no more updates, the installed version of macOS and all of its apps are up to date. That includes Safari, iTunes, iBooks, Messages, Mail, Calendar, Photos, and FaceTime. May 03, 2018 If a version of macOS isn’t receiving new updates, it isn’t supported anymore. For example, in May 2018, the latest release of macOS was macOS 10.13 High Sierra. This release is supported with security updates, and the previous releases—macOS 10.12 Sierra and OS X 10.11 El Capitan—were also supported. May 28, 2020 With the release of macOS Catalina 10.15.5 and related security updates for macOS Mojave and High Sierra earlier this week, Apple is making it more. Feb 03, 2019 The App Store only shows updates for the OS you are using at the moment, in your case Yosemite 10.10.5. If you want to go to another newer OS that is called an upgrade. This can be done through the App Store using the following link. How to upgrade to macOS High Sierra - Apple Support. High Sierra is the last/ newest OS your Mac can use.
How to erase and install OS X 10.6:
Make sure to erase the ENTIRE drive by selecting the drive makers name and disk size at the top, it's so the hidden partitions of later OS X versions are totally erased, thus if you decide to upgrade to later OS X versions via AppStore, they will install the hidden partitions more appropriate for you.
Also if you want to stick with Snow Leopard, the 10.6 install disk version of Disk Utility will be able to properly repair the drive if need be.
More information:
Any non-Internet Recovery capable machines with a new or completely erased boot drive (thus no RecoveryHD partition) will need the appropriate 10.6 install disks or USB thumb drive.
Internet installs of OS X require a fast, reliable, stable and no data capped/restricted size download capability.
All OS X 10.6 disks contain the entire operating system, despite their capability of appearing to upgrade older OS X versions of 10.4/10.5, rather what occurs is the older version is replaced in favor of the newer one, users accounts, files and most programs are left intact.
All OS X AppStore upgrades are also the same, they replace the older version with the newer one, leaving user accounts and most programs intact.
OS X 10.6 white retail disks don't contain the free iLife suite that is on the model specific OS X install disk versions.
iLife can be reinstalled from the OS X 10.6, 10.5 and 10.4 disks or extracted using Pacifist from CharlesSoft, Software Update to bring them current
Free iLife that came on factory installs of OS X 10.7 and up also can be restored if they are not tied to a particular AppleID yet, this occurs if a person buys a 'open box' and the previous customer has returned the machine, the store will wipe the drive of all data, can reinstall OS X from Internet Recovery, but can't reinstall the free iLife. As long as the previous customer didn't accept it in AppStore, it can be reinstalled on the machine by the next owner.
Good Luck 🙂